A lot of web development is centered around languages such as JavaScript and PHP. Developers focused on using Go as a stack may take longer when trying to create a web application from scratch. This article will teach you how to:
- Create a web application with Go from scratch
- Create a HTML template that sends data to your Go application
- Adding remote modules as dependencies into your application
- Work with data from your HTML template to make API requests in your application
Creating a Go module
A module is the starting point of every Go application. To create a module from scratch, navigate to your terminal and first create the directory your module source code will be in
mkdir reloadly-project
cd reloadly-project
Then initialize your module using the go.mod init command:
go mod init airtime
This command will return the following output when creating the module:
Output
go: creating new go.mod: airtime airtime
Once the module has been created, your project’s directory structure should look like this:
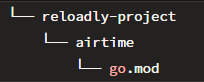
The go.mod file is responsible for tracking any remote dependencies your code will use as well as any other information about your module. Currently, all it contains is your module name and the version of Go you’re working with:
// reloadly-project/airtime/go.mod

module airtime
go 1.16
In Go, modules are distributed from version control repositories (usually Git repositories). You can add other modules as dependencies by referencing the repository path of the module.
To enable your web application to make airtime top-ups, you need Reloadly’s Airtime Go SDK as a dependency. Navigate to your terminal and add the SDK to your module:
go get -u github.com/reloadly/reloadly-sdk-golang
Once this is done, your go.mod file should be updated with the details of the SDK
module airtime

go 1.16

require github.com/reloadly/reloadly-sdk-golang v1.0.1
Executing your Go module
To make your module an actual program that can be executed, you need to create a file where your code/logic can be written. In your airtime module directory, create a main.go file and add the code snippet below:
// /airtime/main.go

package main

import "fmt"

func main() {
        fmt.Println("Hello, World!")
}
In the above code snippet, you made use of the following:
main: A package that works with Go’s compiler to turn your module to an executable program.fmt: A package that formats basic strings and values. It is mainly used for printing information to the terminal.main(): A function that serves as the entry point of your module. Once your program is run, Go will look for this function and execute any code in it.
To execute your Go module, run the go run command in your terminal just like the snippet below:
go run main.go
You should see the following message in your terminal
Hello, World!
Creating your HTML Template
Your next step is to create a HTML template where users can view and interact with. In the root directory of your project, create a folder named templates and in this folder, create a file named airtime.html
Remember you are building a web app that can send airtime top-ups. In airtime.html, create a form that receives inputs of the details necessary to make an airtime top-up:
  <!-- templates/airtime.html -->

<div>
   {{if .Success}}
   <div>
      <p>Your top-up is successful!</p>
   </div>
   {{else}}
   <div>
      <h1>Topup Form</h1>
   </div>
   <div></div>
   <form action="/airtime.html" method="POST">
      <input
         type="text" placeholder="your operator's id" name="operatorid"
         />
      <input
         type="text" placeholder="your top-up amount (NGN)" name="amount"
         />
      <input
         type="text" placeholder="your unique reference" name="reference"
         />
      <input
         type="text" placeholder="recipient's phone number" name="number"
         />
      <input type="text" placeholder="recipient's country code" name="countrycode"/>
      <input  type="submit" value="send" />
   </form>
   {{end}}
</div>
In the code snippet above, an inline expression is added to communicate with your web server and choose what to display based on what stage of making the top-up you are in. This inline expression will be referenced in your web server as well.
Creating your HTTP Server
Every HTTP server written in Go should contain at least two major functions:
http.HandleFunc: This function is responsible for telling the server how HTTP requests made to a specific route should be handledhttp.ListenAndServe: This function starts the server, listens for any changes or requests fromhttp.HandleFuncand executes them.
In your main.go file, initiate the http.HandleFunc function to make a request to the "/" route :
// /airtime/main.go

package main

import (
    "fmt"
    "net/http"
    "html/template"
)

func main() {
    tmpl, err := template.ParseFiles("./templates/airtime.html")
    if err != nil {
        log.Fatal("Parse: ", err)
        return
    }

    http.HandleFunc("/", func(w http.ResponseWriter, r *http.Request) {
        if r.Method != http.MethodPost {
            tmpl.Execute(w, nil)
            return
        }

       fmt.Println("Server works!")
    })
    http.ListenAndServe(":8000", nil)
}
In the code snippet above:
- The
net/httpandhtml/templatepackages are imported to handle HTTP implementations and render HTML templates respectively. - In the
main()function, theParseFiles()function is used to securely parse theairtime.htmltemplate. - The
handleFunc()function makes use of theResponseWriterinterface to construct HTTP responses for any request that will be received by the server. - The Request interface represents the HTTP request details that will be sent to the server.
- A conditional is specified for the type of HTTP request to expect, the parsed template (
airtime.html) to be executed in the request and its output written to Go’s workflow runner
As a confirmation that the server receives the parsed HTML template, the message "Server works!" is printed out on the terminal once a successful request is sent when the server is live. Execute your server via the go run command in the terminal and navigate to localhost:8000 on your browser. You should see your airtime top-up form:
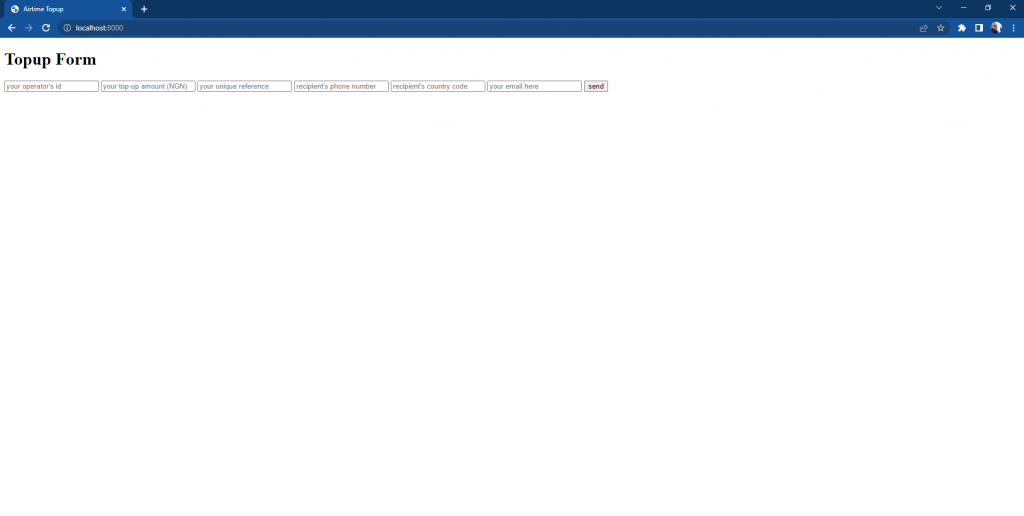
Clicking on the send button will redirect the page to localhost:8000/airtime.html which will be blank as the inline expressions set in your HTML template have not yet been referenced in your server. You should also get the message that says Server works! in your terminal.
PS C:\Users\ugwur\reloadly-airtime-form-golang> go run main.go
Server works!
Working with Reloadly’s SDK
To access the APIs needed to send airtime top-ups successfully, you will need to install Reloadly’s SDK in your project:
go get -u github.com/reloadly/reloadly-sdk-golang
You will also need client credentials for securing any top-up you make. Steps on how to get them are in Reloadly’s Go QuickStart
Once the installation is complete, import the SDK to your main module. Also create a struct that mirrors the form input details of your HTML template:
// /airtime/main.go

package main
import (
    "fmt"
    "html/template"
    "log"
    "net/http"
    reloadly "github.com/reloadly/reloadly-sdk-golang/airtime"
)
type TopupDetails struct {
    OperatorID  string
    Amount      string
    Reference   string
    Number      string
    CountryCode string
}

// ...
Next, you need an access token to authenticate every top-up request made to your server. Access tokens can be generated using Reloadly’s NewClient() function:
// /airtime/main.go

// ...

func main() {

// ...

  rAccessToken, err := reloadly.NewClient("YOUR_CLIENT_ID_HERE", "YOUR_CLIENT_SECRET_H   ERE", true)
    if err != nil {
        fmt.Println(err)
    }

// ...

}
// ...
Once this is done, you need to link all user input from the HTML template to the top-up request you will make with Reloadly’s SDK:
// /airtime/main.go

// ...

func main() {

// ...

  http.HandleFunc("/", func(w http.ResponseWriter, r *http.Request) {
    // ...
        rTopupDetails := reloadly.Topuprequest{
            Amount:     r.FormValue("amount"),
            OperatorID: r.FormValue(("operatorid")),
        }
        rCustomIdentifier := reloadly.AddCustomIdentifier(r.FormValue("reference"))
        rPhone := reloadly.Phone{
            Number:      r.FormValue("number"),
            CountryCode: r.FormValue(("countrycode")),
        }
    // ...
  })

// ...

}
// ...
Lastly, you need to create a top-up function that sends a request using all the details stored in the rAccessToken, rTopupDetails, rCustomIdentifier, and rPhone variables.
// /airtime/main.go
// ...

import (
// ...
    "encoding/json"
// ...
)

func main() {
// ...
  http.HandleFunc("/", func(w http.ResponseWriter, r *http.Request) {
    // ...
    rTopUp, err := rAccessToken.Topup(rTopupDetails.Amount, rTopupDetails.OperatorID,       true, rPhone, rCustomIdentifier)
        if err != nil {
            fmt.Println(err)
        }
       jsonResp, err := json.Marshal(rTopUp)
        if err != nil {
            log.Fatalf("Error happened in JSON marshal. Err: %s", err)
        }
        fmt.Printf("json data: %s\n", jsonResp)
        tmpl.Execute(w, struct{ Success bool }{true})
    // ...
  })
  http.ListenAndServe(":8000", nil)
// ...
}

// ...
Convert the response gotten from your request to JSON with the json.Marshal() function. Then use the Execute function to call the inline expression specified in your HTML template. When you are done, your main.go file should look like this playground
Making a Top-up
At this point, your server should be complete. Start the server, navigate to localhost:8000 and attempt a top-up
To confirm that your top-up was successful, response details will also be logged on your server:
C:\Users\ugwur\reloadly-airtime-form-golang> go run main.go

json data: {"transactionId":44380,"operatorTransactionId":null,"customIdentifier":"airtime-100001","recipientPhone":"2348147658720","recipientEmail":null,"senderPhone":"","countryCode":"NG","operatorId":341,"operatorName":"MTN Nigeria","discount":0,"discountCurrencyCode":"NGN","requestedAmount":100,"requestedAmountCurrencyCode":"NGN","deliveredAmount":100,"deliveredAmountCurrencyCode":"NGN","transactionDate":"2022-10-25 21:01:09","pinDetail":null,"balanceInfo":{"cost":100,"currencyCode":"NGN","currencyName":"Nigerian Naira","newBalance":733733.01091,"oldBalance":733833.01091,"updatedAt":"2022-10-26 01:01:09"}}
Styling
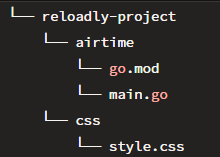
Applying this section to your project may be optional. To apply styling to a HTML template, create a separate folder named css and in it, create your CSS file.
Import this into your HTML template as you normally would but add an extra forward slash. This is because Go will only render a file if it’s directory is registered in a Go module. After creating your CSS file, your project’s folder structure should look something like this:
Then in your main.go file, register the CSS file using the http Handle() function:
// /airtime/main.go
// ...

import (
// ...
    "encoding/json"
// ...
)

func main() {
// ...
  http.Handle("/css/", http.StripPrefix("/css", http.FileServer((http.Dir("css")))))

  http.HandleFunc("/", func(w http.ResponseWriter, r *http.Request) {
    // ...
       // HTTP methods and top-up requests go here
    // ...
  })
  http.ListenAndServe(":8000", nil)
// ...
}

// ...
Summary
In this article, we reviewed how to use Go in building web applications. We also went a step further to integrate REST APIs in our application. Should you need the full repository of this tutorial’s project, you can find it on GitHub.